
3D Starship in the Prague cityscape
The idea for this project came from the discussion on elonx.cz, where someone mentioned, that Starship heavy / Star ship combination would be taller than the tallest building in Prague. Someone else corrected him that the Žižkov Television Tower would still be the tallest building. Then there were pictures posted, and I thought "hey, lets put Starship there, just for the comparison".
The following write-up is mostly notes for me, to remember lessons learned while trying to add Starship there.
Reference images

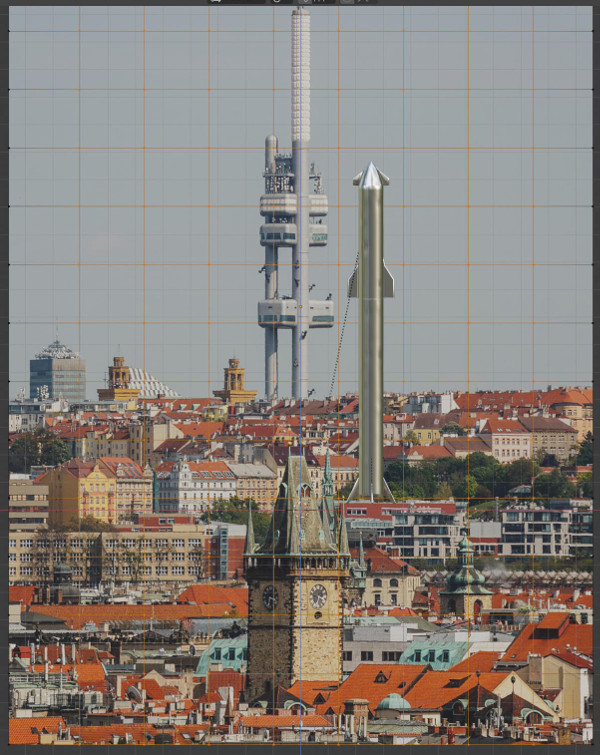
First step is obvious - create new blender project and import the image into it as a reference image. Then get some measurements info about the Žižkov tower and create appropriate 3D object, so the image can be scaled up to the "real" units simply by shadowing the tower with the 3D object.
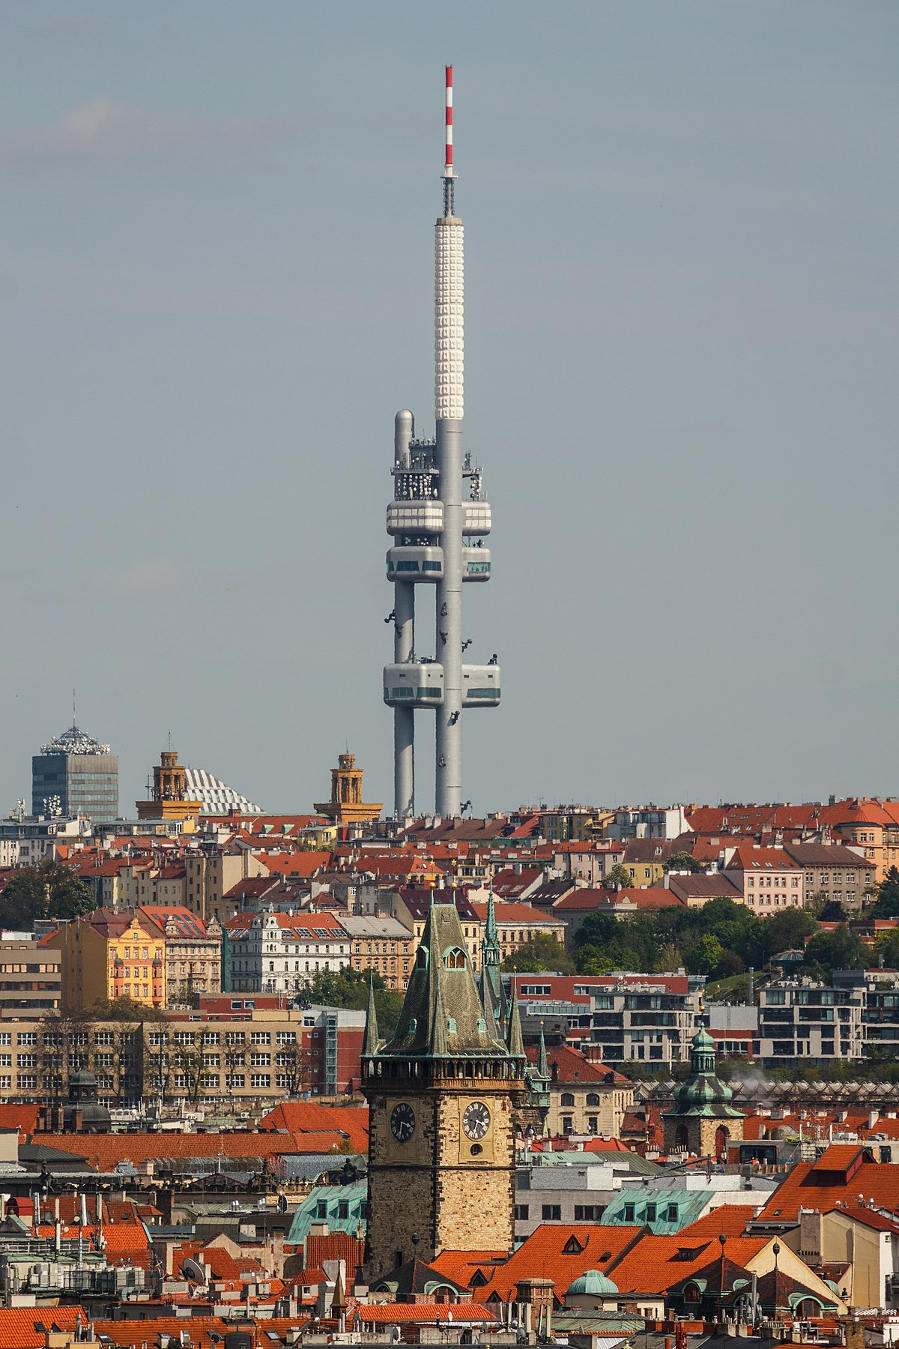
From what I could find, Žižkov Television Tower has one pillar slightly bigger than the other two. It is the one we can see on the image on the right, and it is currently overshadowing the third pillar. It has 6.4 meters in diameter and all pillars are 134 meters tall.
The extended part with TV broadcast aerial should be 216 meters tall. I've created two cylinders, both 6.4 meters in diameter, left one 134 meters tall and second 216 meters tall and just imposed them on the image.
I was worried that it is weird that they start so much "under" the houses, but the houses there are tall and the towers start 15 meters under the level of the ground, so it should be roughly ok.
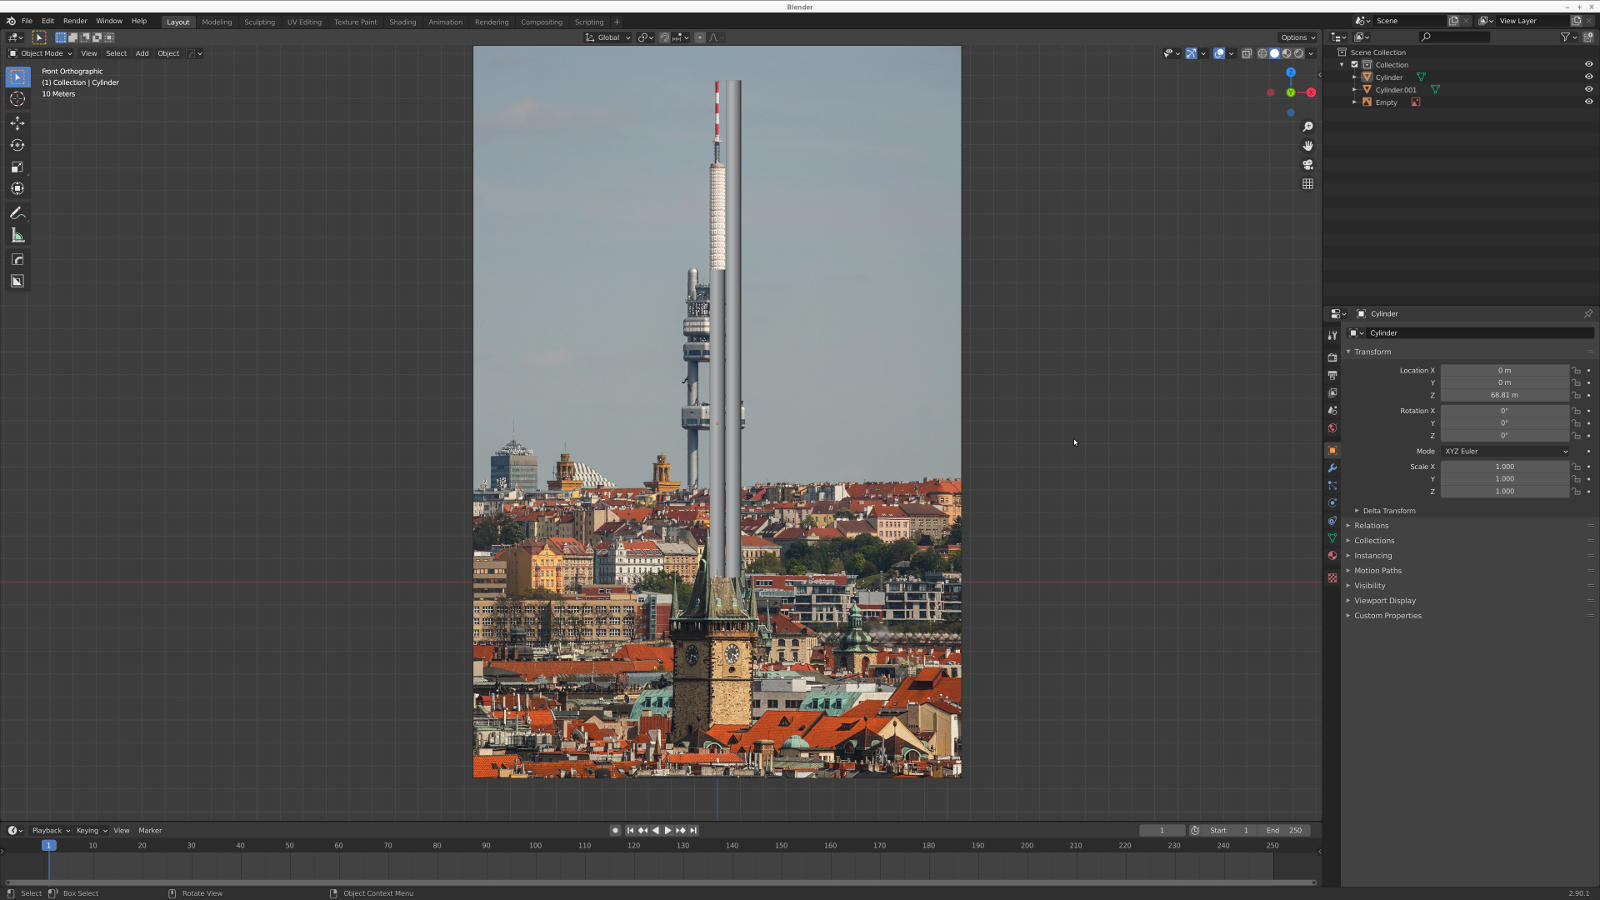
I've checked that the diameter matches using Blender's measurement system. Since both objects should be in the same distance and there is not much perspective going on, this should be pretty accurate.

Now when I had the image scaled to roughly the right size, I could add the starship.
3D modeling
As always lately, the act of creating the 3D model itself was pretty quick and I was done in no time. I just added two cylinders, one 72 meters tall for super heavy, second 50 meters tall for starship itself. Then I modeled the top cone from a few loopcuts that get smaller and smaller. For the wings, I used some random image from the internet as reference model. Wings are basically just reshaped cubes with few loopcuts and bevels.

I added a lot of loopcuts and some deformities to the model, so it more resembles the deformed nature of the stainless steel SpaceX is using.
Shading
I used the most basic stainless steel shader for the material of the Starship; just simple "Glossy BDSF". I've played with it, until it looked nice, (roughness set to 0.211444).

Then I added sun and a camera and switched to Render preview. I was quite surprised, that it looked like this:

The sun was shining enough, so why it looked great in Material preview mode, but horrible in Render preview mode?
It took me some time, but then I remembered how some YouTubers I watch use some kind of HDR picture, which is like 360° circular picture used for background lightning. I've googled until I learned how to do that. It turned out that it is quite simple; just add "Environment image" node in the Shader tab, when you select World as an object.
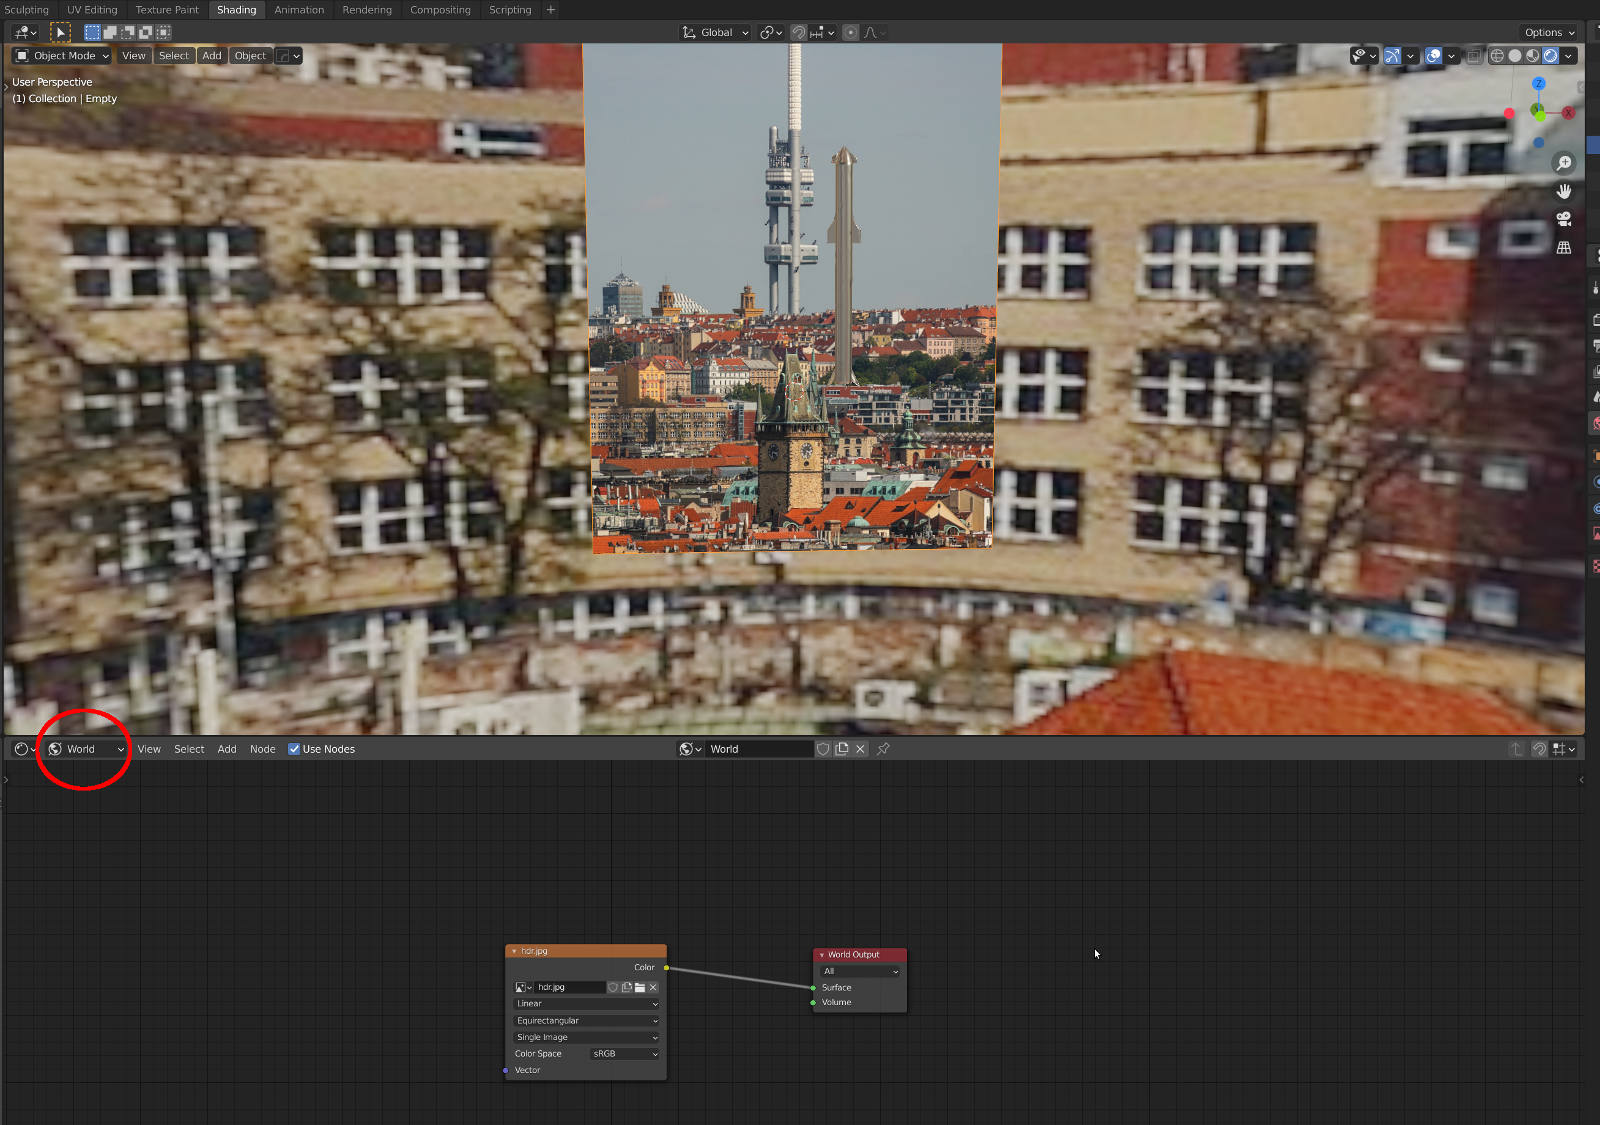
I've decided to use the same background image, but I've cut out the sky, because otherwise there was so much blue reflecting back to the camera, that you couldn't really see anything (blue rocket reflection on blue background).
I also set the "Film" property of the "Scene" tab in the right menu to "Transparent", so the background wouldn't be present in view and the final render, but it would still affect the colors of the rocket.
Render troubles
Next, I've tried to render the image, but it didn't work. Only the rocket rendered. I was quite surprised (and annoyed) to discover, that Blender doesn't render reference images.
I can understand how this is useful, as you usually don't want them in the final render, but what you have to do in order to get the actual image into the scene is quite absurd:
You have to enable the "Import-Export Import images as Planes" add-on, then import and position the image again, and then they'll be there. Wtf Blender, are you drunk?
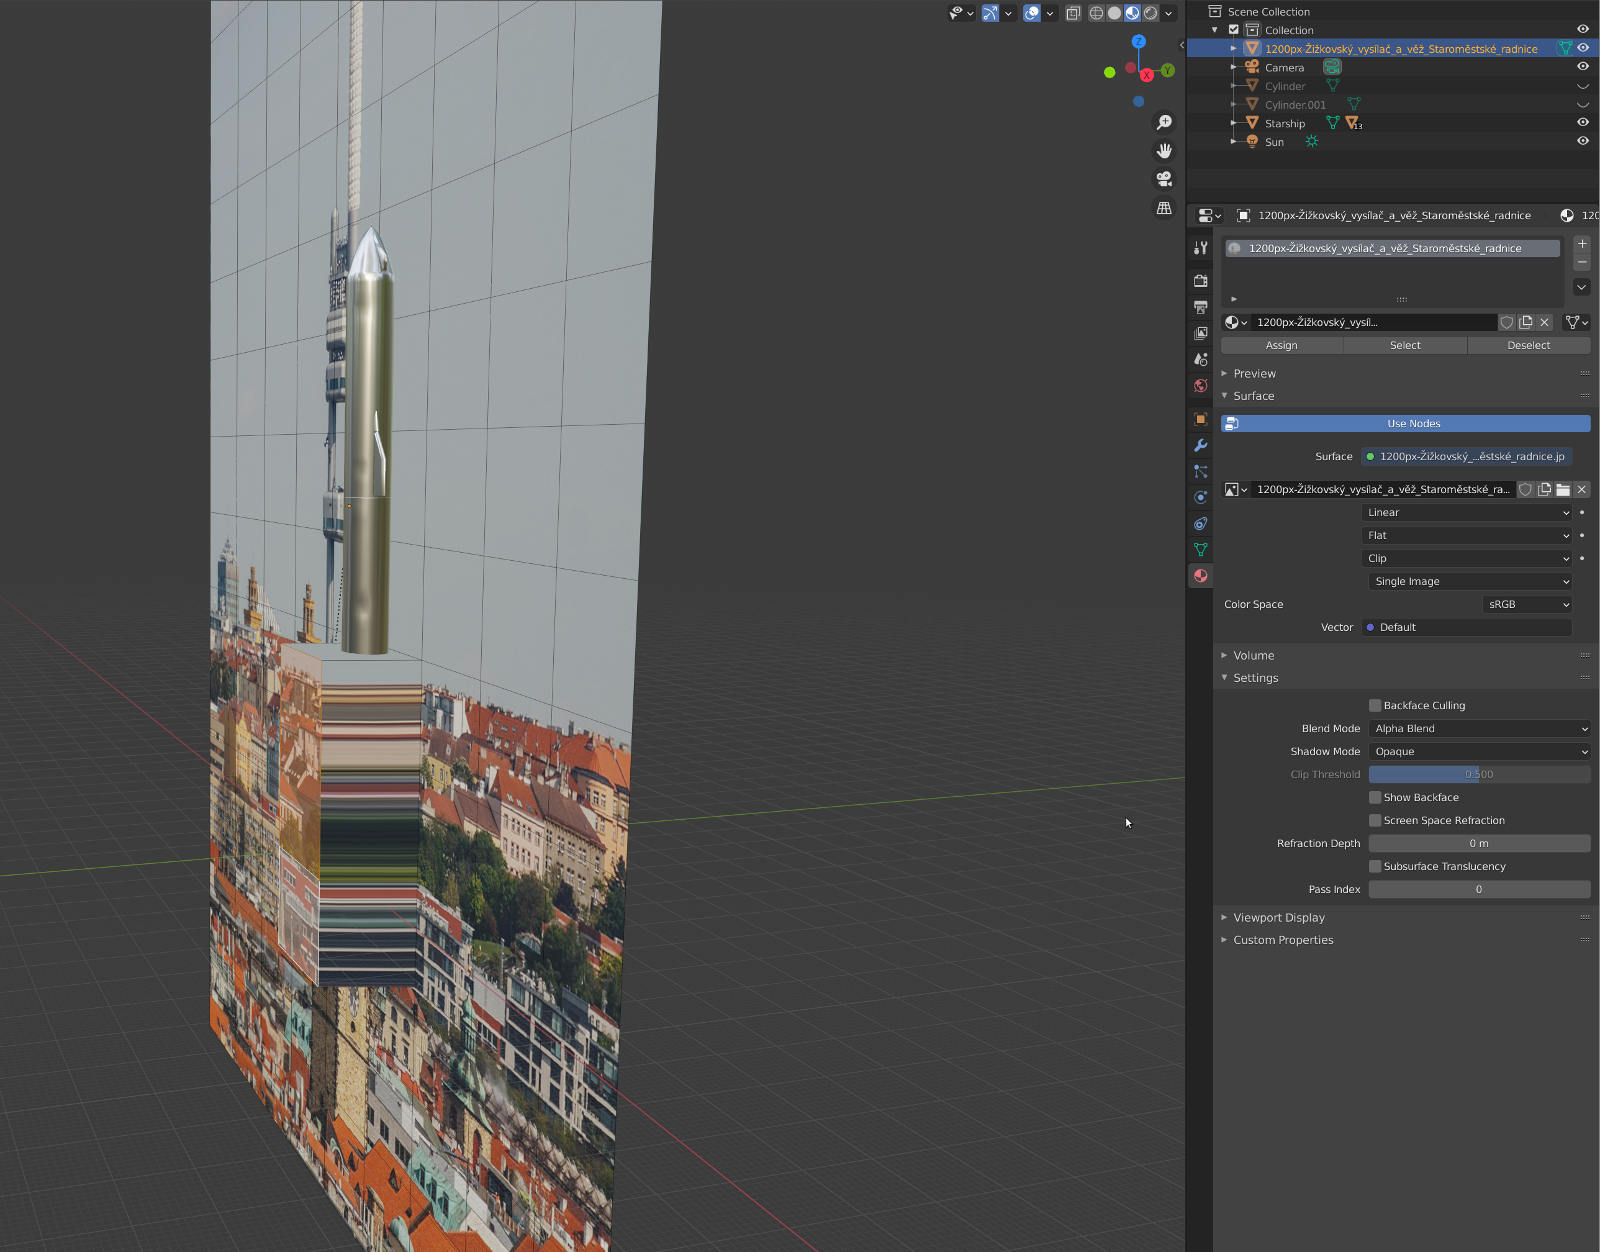
So I added the image this way, as a plane, scaled it up so it matched the original reference image. I discovered, that I cannot simply transfer the rotation and scale values, because reference images are the "Empty" type and you can't just use its values to newly added "Plane". When I finished, it looked like a potato again:

Luckily, this was easy enough to figure out. Blender assumed that I wanted to assign a new material with Principled BSDF shader.

Simply piping the image from the Image node to the Material output node did the trick.

Now it can be rendered:
Illusion of placement
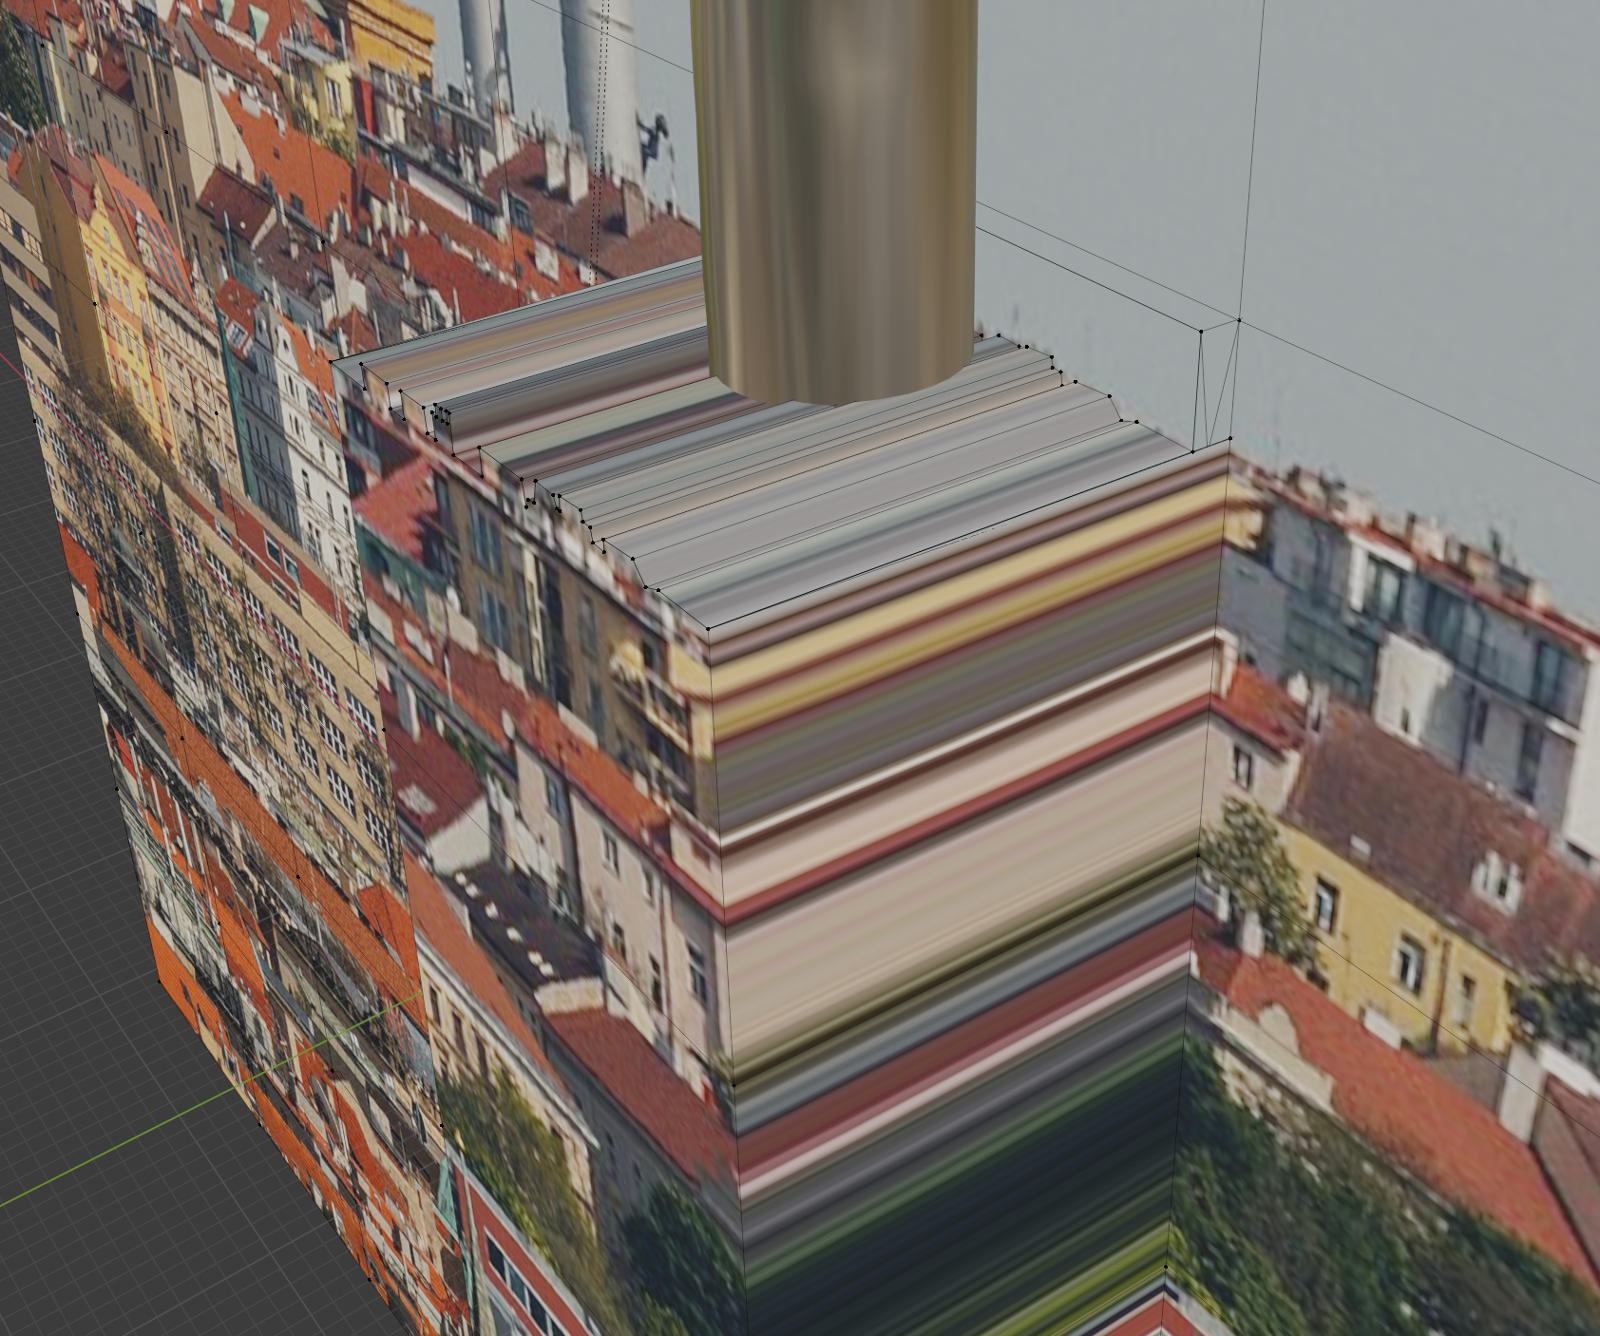
But there is still something missing - specifically the lower part is visible, when it shouldn't. This has simple solution - to move part of the image closer to the viewer. I just added some loopcuts to the image:
Then I selected faces that are behind the starship and extruded them closer to the camera.
It is a good idea to disable "Show backface" option in the right menu, as it looks and acts really weird.
I also moved Cursor to the Camera's position, and then used it as a pivot point, so when I moved the extrusion, it faced the camera. I then resized and moved the faces a bit, until it looked right.

The sky was now blocking part of the ship, so I added a cut using knife tool, in the shape that vaguely followed the relief of houses. Then I moved the top part to the background.
Blurry renders
I've rendered what I thought will be the final version of this render, but it looked like the whole city is in smog:

Left part has more lively colors than the right part. I spent an hour by trying to increase number of cycles in render, trying different shaders and so on, but nothing seemed to help. Then I finally found this stack overflow thread Images as emitters constantly come out dull. White emission not actually white. What am I doing wrong?. It turned out, that by default, blender uses "Filmic" "View transform", and I wanted "Standard".
I also changed renderer to Cycles, which made the tower mirror in the surface of the Starship.
There is still some loss of crispiness going on, but at this point, I was exhausted and had enough of 3D for that day.
Final render
I also added SpaceX logo. I had problems that logo didn't want to curve itself on the surface:
Then I had realized, that it doesn't have enough geometry to curve itself, so I added a few loopcuts and everything worked as expected.
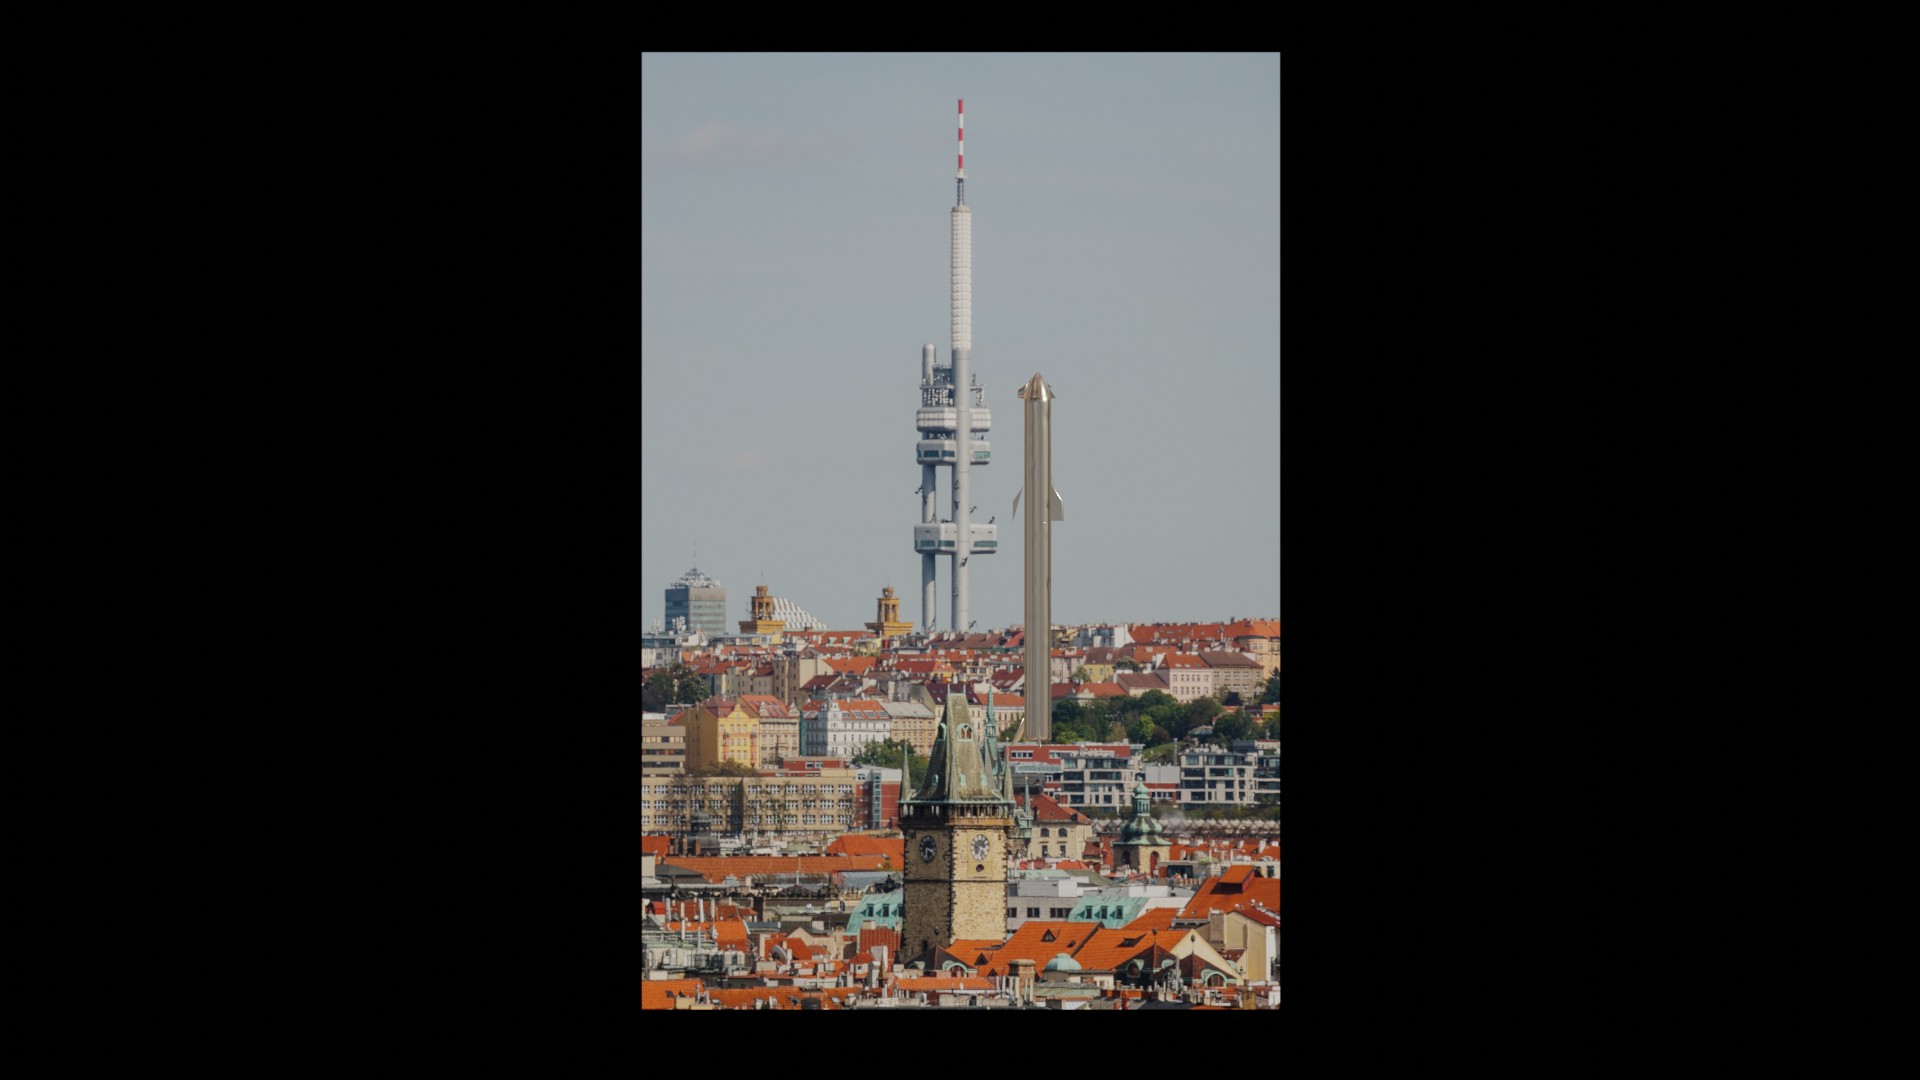
Then I added grid fins, and some more geometry to wings, just for fun. Here is the final result.

The measurements should be ± right. The pillars of the TV towers should be 134 meters tall, SS/SH combination should be around 122 (72 + 50) meters tall, so slightly smaller than the pillars. Diameter of the right pillar of the TV tower is 6.4 meters, diameter of the Starship is 9 meters. Blender measurements say that this is indeed correct.
Lessons learned
Although this was just a quick "lets try that" idea, I have learned a ton of new stuff. How to work with shaders, how to use environment shader, how to increase quality of the picture.
I am always quite amazed, how much difference is there when you learn something from the book, or maybe some YouTube tutorial, and then you have to go and do that stuff by yourself, for your project.
Relevant discussion
- /r/SpaceXLounge (51+ comments)
